Introduction
Postman is a desktop and web application that lets you make requests to an API from a graphical user interface. We recommend using Postman with the X API, X Ads API, and Labs endpoints when you explore API functionality or troubleshoot issues with your application. We currently have two Postman collections available:X API v2 Collection
X Ads API Collection
Prerequisites
Before you start with X’s Postman collections, make sure you have the right access and credentials for the X developer platform tool you plan to use. See the Getting started page for more on access. You’ll need the following before you continue:- A developer account.
- A developer App.
- A set of authentication keys and tokens.
- An environment configured to make requests to the API you plan to use.
Getting started with X’s Postman collections
Step one: Add one of the X Postman collections to your account
You could build out specific endpoints in Postman yourself, but we’ve done the heavy lifting for you. Select one of the links in the Postman collections section above and a ready-to-use collection with all of the endpoints for the selected API is added to your Postman app. These collections are also available in the Postman API network. Each endpoint comes preconfigured with available parameters, example responses, and authentication type. You only need to add your credentials and parameter values to start exploring. In this example, we’ll work with the X API v2 collection.Step two: Add your keys and tokens as environmental variables
When you add the collection to your Postman instance, it automatically creates an environment called “X API v2”. You need to add your keys and tokens to this environment. In this step, we’ll walk you through adding the keys and tokens from your developer App into the “X API v2” environment. To add your keys and tokens, select the “manage environments” button in the top right corner of Postman.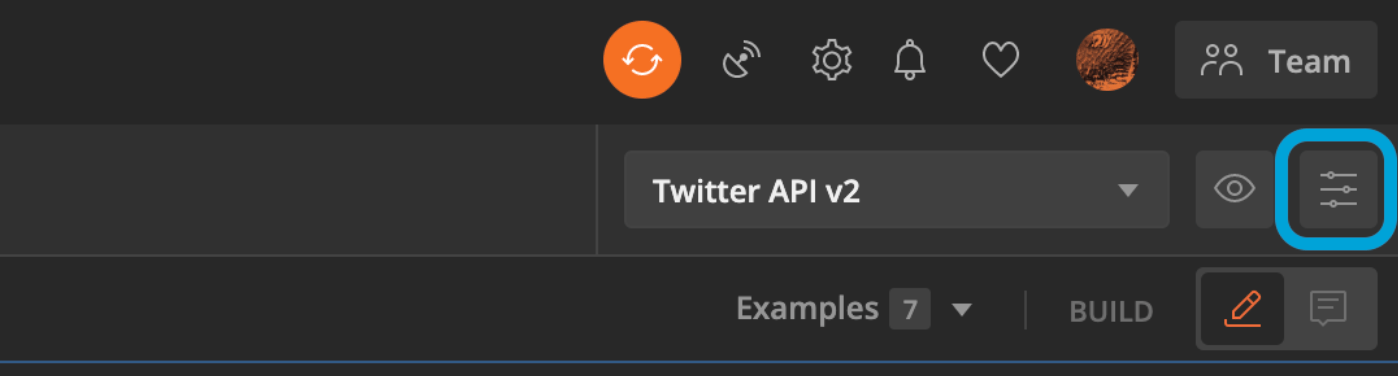
| VARIABLE | INITIAL VALUE | CURRENT VALUE |
|---|---|---|
| consumer_key | QAktM6W6DF6F7XXXXXX | QAktM6W6DF6F7XXXXXX |
| consumer_secret | AJX560A2Omgwyjr6Mml2esedujnZLHXXXXXX | AJX560A2Omgwyjr6Mml2esedujnZLHXXXXXX |
| access_token | 1995XXXXX-0NGqVhk3s96IX6SgT3H2bbjOPjcyQXXXXXXX | 1995XXXXX-0NGqVhk3s96IX6SgT3H2bbjOPjcyQXXXXXXX |
| token_secret | rHVuh7dgDuJCOGeoe4tndtjKwWiDjBZHLaZXXXXXX | rHVuh7dgDuJCOGeoe4tndtjKwWiDjBZHLaZXXXXXX |
| bearer_token | AAAAAAAAAAAAAAAAAAAAAL9v6AAAAAAA99t03huuqRYg0mpYAAFRbPR3XXXXXXX | AAAAAAAAAAAAAAAAAAAAAL9v6AAAAAAA99t03huuqRYg0mpYAAFRbPR3XXXXXXX |
Step three: Select an endpoint
Next, choose an endpoint from the collection and build your request. You can select an endpoint from the right-hand side navigation. Here is what this looks like: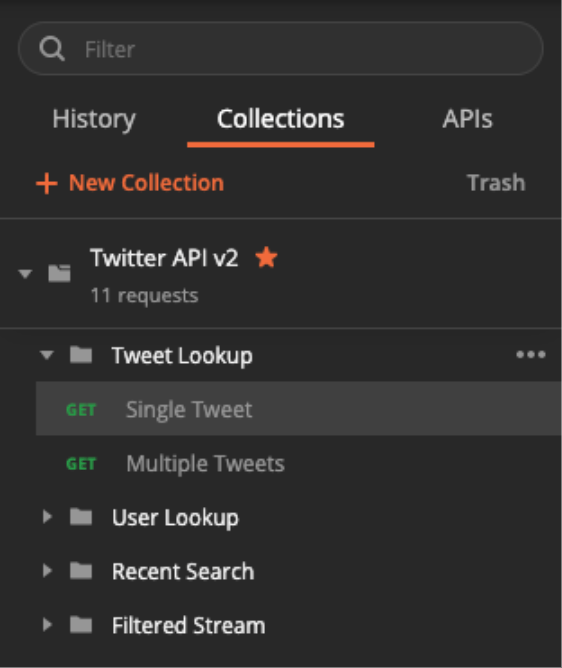
Step four: Add values to the Params tab
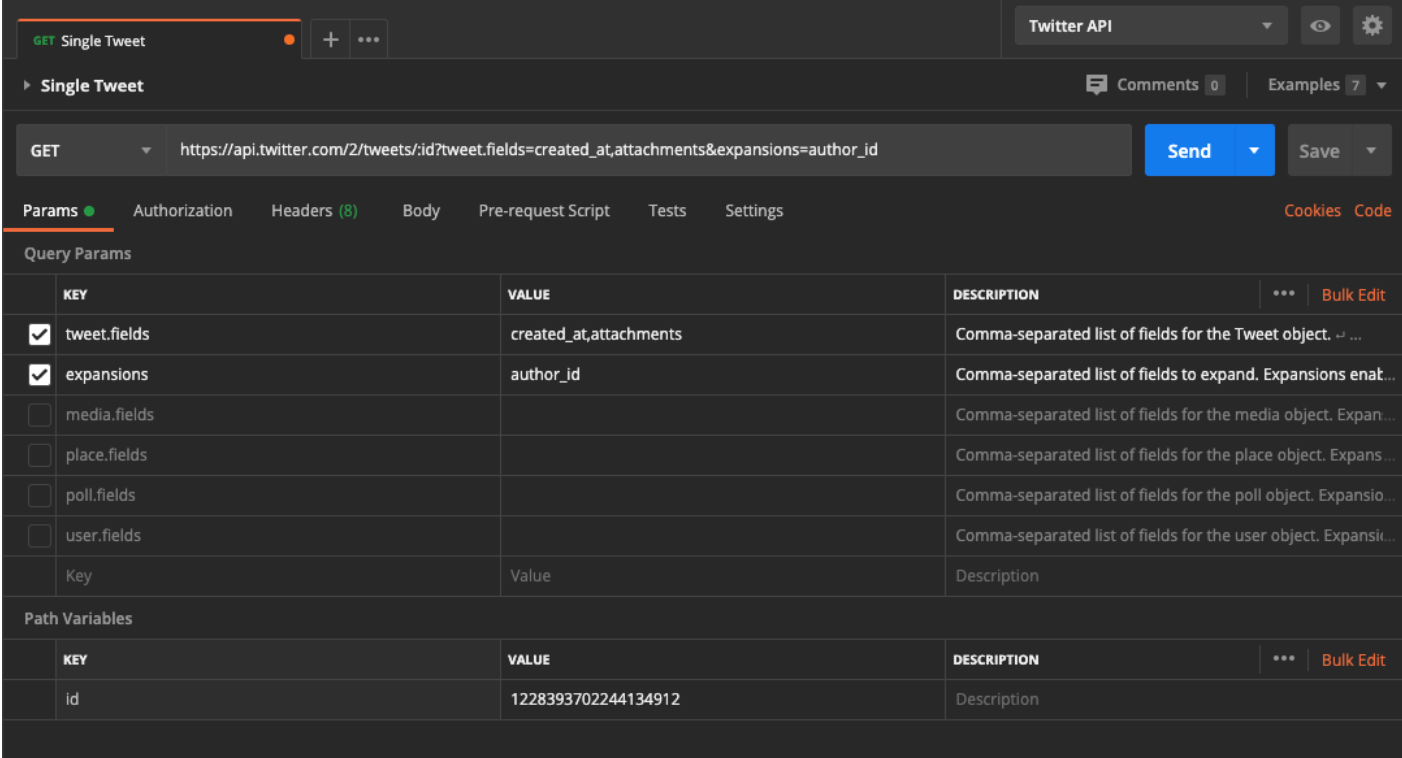
Next, navigate to the Params tab. You should see a set of inactive params with descriptions that explain what each parameter does and a list of the values you can pass with your request. In this example, we’ll activate theexpansions and tweet.fields query parameters and add the following values:
| Key | Value |
tweet.fields | created_at,attachments |
| expansions | author_id |
id. Since this endpoint returns Posts, add a valid Post ID as the value.
You can find the Post ID by navigating to x.com, selecting a Post, and looking at the URL. For example, the following URL’s Post ID is 1228393702244134912:
https://x.com/XDevelopers/status/1228393702244134912
On the Params tab, scroll down past the query parameters to display the “Path Variables” section. Add the Post ID you want to use as the value for the id key.
If you entered everything correctly, the Params tab should look like the following:
Step five: Send your request and review your response
Now that your request is set up, select the “Send” button. If everything was set up properly, you should receive the following payload:Generating a user access token with Postman
Using OAuth 1.0a to generate a user access token
Review the three-step process used in the OAuth 1.0a flow test collection.Using OAuth 2.0 to generate a user access token
You can generate OAuth 2.0 access tokens to use with the X API v2 Postman collection. Select the collection in your workspace, go to the “Auth” tab, and set the type to “OAuth 2.0”. Under “Configure New Token”, find “Configuration Options” and update the “Grant Type” to “Authorization Code (With PKCE)”. Update your Callback URL to match the callback URL associated with your application. Also update the following parameters:- Auth URL —
https://x.com/i/oauth2/authorize - Access Token URL —
https://api.x.com/2/oauth2/token - Client ID — Your OAuth 2.0 client ID from the Dev Portal
- Client Secret — If you are using a confidential client
- Scope — Scopes to match the endpoints you want to connect to. For example:
tweet.read users.read - Your callback URL (also known as the redirect URL). This must match the value in your App’s authentication settings.
- State — state